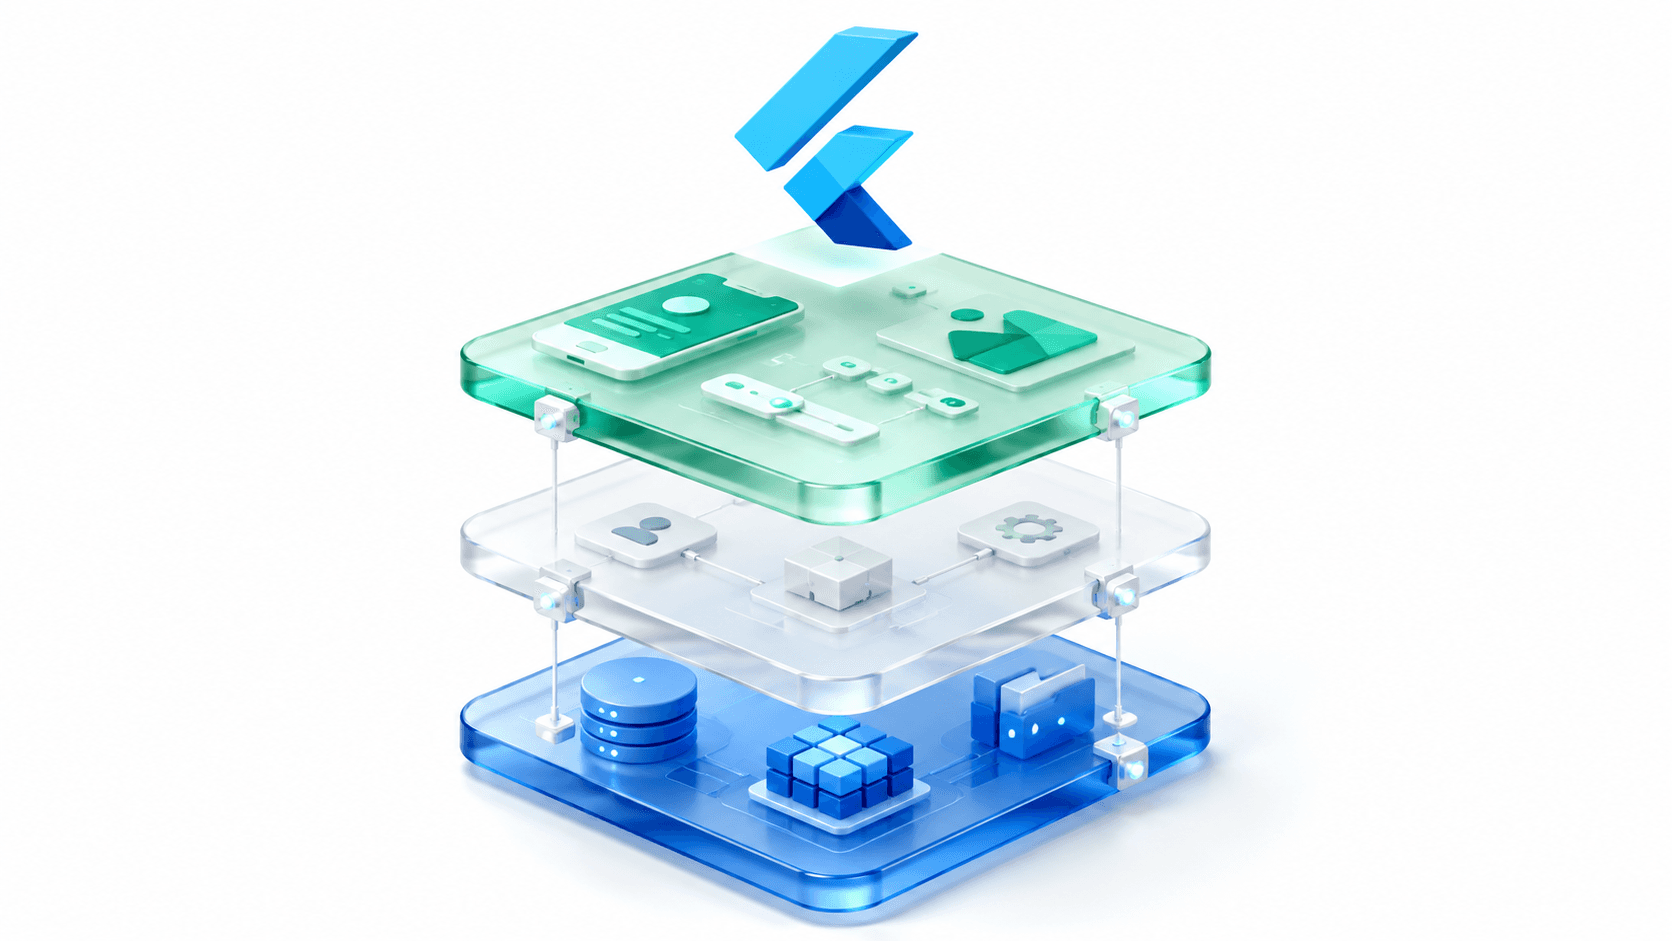
Introduction
As mobile applications grow from simple prototypes into full-scale production products, the codebase naturally increases in complexity. If your code is not organized around clear engineering principles, you will eventually face a common set of problems: slow feature delivery, regressions when updating code, fragile state management, and tests that are nearly impossible to write.
In my years of shipping mobile apps, I have found that the most reliable solution to these scalability hurdles is Clean Architecture. Originally popularized by Robert C. Martin (Uncle Bob), Clean Architecture enforces a strict separation of concerns, ensuring that your business logic remains independent of databases, network clients, and the user interface.
To help developers bypass the repetitive setup phase and start building immediately, I created a production-ready Flutter Clean Architecture Template.
In this comprehensive guide, I will break down the core layers of Clean Architecture in Flutter, show you how to organize features modularly, set up dependency injection with GetIt, manage UI state with Provider, implement a zero-dependency built-in responsive scaling system, and demonstrate how you can leverage my template to bootstrap your next project in seconds.
What is Clean Architecture?
Clean Architecture is a software design philosophy that splits a software system into distinct layers. The core rule that holds the entire system together is the Dependency Rule: all source code dependencies must point inward.
This means that inner layers know absolutely nothing about outer layers. The core business logic of your app has no awareness of your database, your REST API client, or the Flutter UI widgets.
The Concentric Layers of Clean Architecture
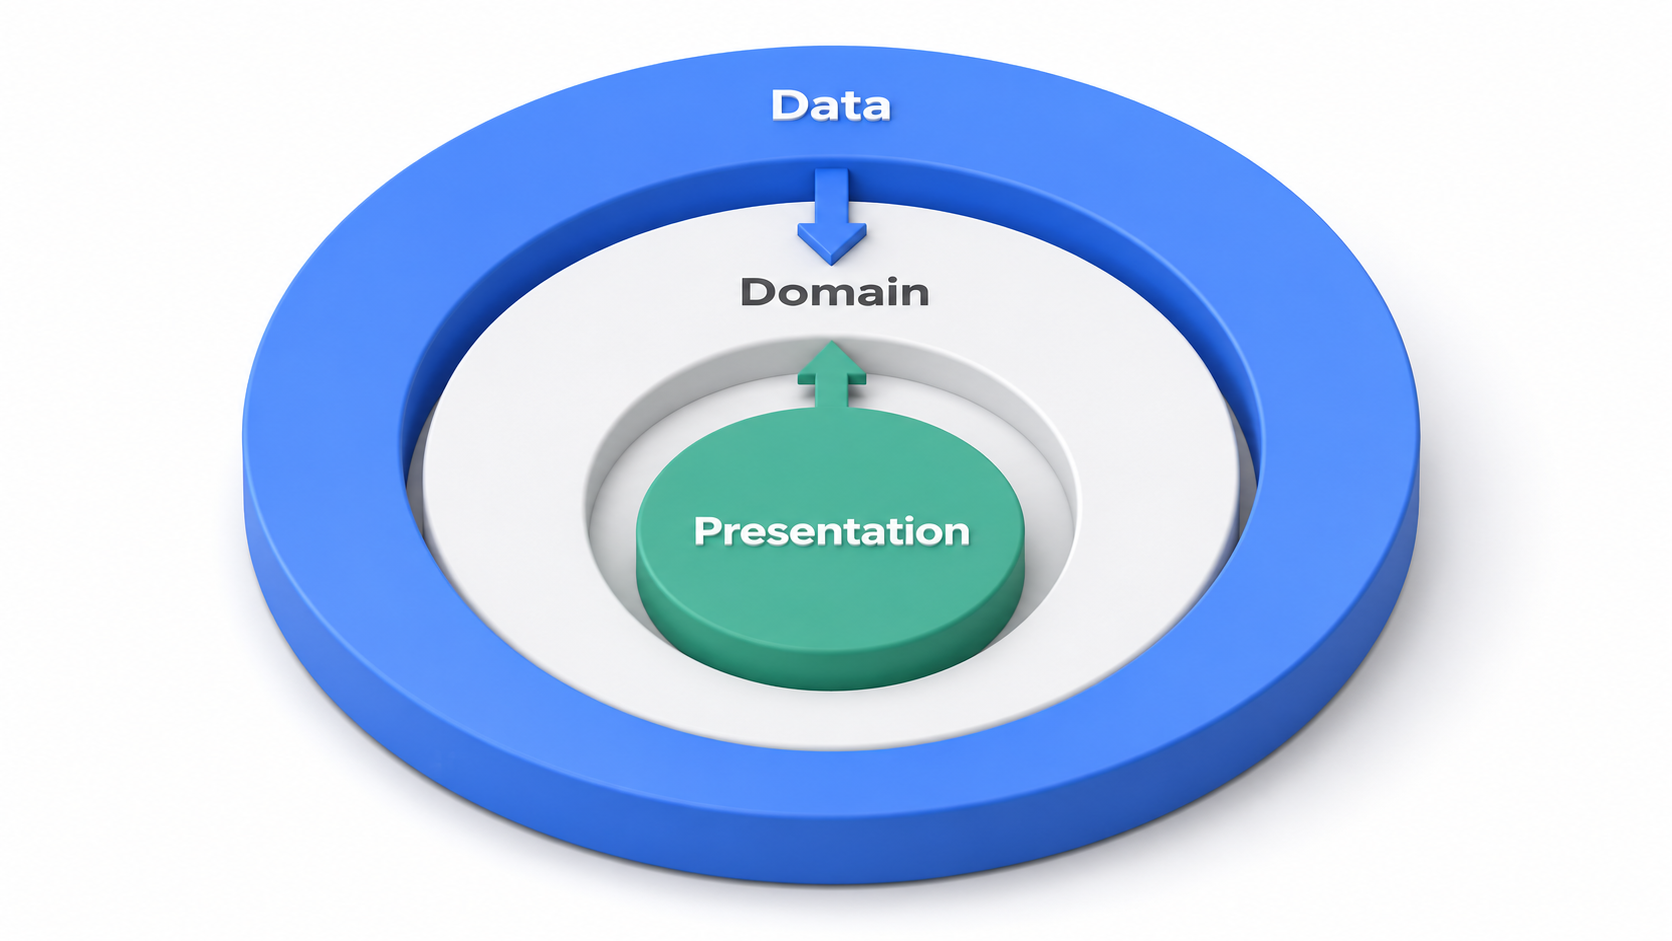
- Domain Layer (Core): Contains the pure business logic of your app. It defines what your app actually does. This layer is completely framework-independent (pure Dart).
- Data Layer (Outer): Handles data retrieval, local storage, API networking, and repository implementations.
- Presentation Layer (Outer): Manages the user interface, UI components, responsive layout scaling, and state controllers.
Domain Layer: The Business Core
The Domain layer is the heart of your application. It contains the business rules and contracts that define the behavior of the product. It must remain pure Dart, meaning it should never import package:flutter/material.dart or any database helper library.
Key Components of the Domain Layer
- Entities: Simple, immutable Dart objects representing the core business concepts (e.g.,
User,Transaction,Product). - Use Cases: Classes that execute specific, single business actions (e.g.,
LoginUser,FetchProductDetails,UpdateCartStatus). - Repository Interfaces: Abstract contracts defining how data should be retrieved. The Domain layer does not implement database or API calls; it simply defines the rules.
Implementing a Use Case
Here is an example of a domain use case class:
import 'package:dartz/dartz.dart';
import '../repositories/auth_repository.dart';
import '../../core/entities/user_entity.dart';
import '../../core/services/dio/dio_exceptions.dart';

class LoginUserUseCase {
  final AuthRepository repository;

  LoginUserUseCase(this.repository);

  Future<Either<NetworkException, UserEntity>> call(String email, String password) async {
    // Validate inputs or apply business rules before execution
    if (!email.contains('@')) {
      return Left(NetworkException(message: 'Invalid email address format'));
    }
    return await repository.login(email, password);
  }
}
Data Layer: Infrastructure & Sources
The Data layer is responsible for retrieving and persisting data. It implements the contracts defined by the Domain layer and communicates with external network APIs, databases, and local file storage.
Key Components of the Data Layer
- Models: Classes extending Domain Entities that include serialization logic (e.g.,
UserModel.fromJson,UserModel.toMap). - Data Sources: Classes making direct network HTTP requests (via client libraries like
Dio) or accessing local storage databases (Hive, secure storage). - Repository Implementations: Classes implementing the Domain Repository contracts, deciding whether to fetch data from the network API or return cached results from local storage.
If people need to edit records while disconnected, a cache alone is not enough. The offline-first Flutter sync guide extends this data-layer design with a durable local outbox, retries, and conflict handling.
Implementing a Data Repository
Here is an example of a repository implementation:
import 'package:dartz/dartz.dart';
import '../../domain/repositories/auth_repository.dart';
import '../datasources/auth_remote_datasource.dart';
import '../../core/entities/user_entity.dart';
import '../../core/services/dio/dio_exceptions.dart';

class AuthRepositoryImpl implements AuthRepository {
  final AuthRemoteDataSource remoteDataSource;

  AuthRepositoryImpl({required this.remoteDataSource});

  @override
  Future<Either<NetworkException, UserEntity>> login(String email, String password) async {
    try {
      final userModel = await remoteDataSource.loginWithEmail(email, password);
      return Right(userModel); // Upcasts automatically to UserEntity
    } on ServerException catch (e) {
      return Left(NetworkException(message: e.message));
    } catch (e) {
      return Left(NetworkException(message: 'An unexpected connection error occurred'));
    }
  }
}
Presentation Layer: UI & State Management
The Presentation layer is where Flutter lives. It takes user interactions, calls the Domain Use Cases, updates state variables, and paints the interface pixels on the device screen.
This template combines the MVVM (Model-View-ViewModel) UI pattern with Provider for state management:
- Model: The Domain Entities containing the data.
- View: The Flutter screen widgets that observe state updates and render the UI.
- ViewModel (Provider/ChangeNotifier): The state controller class that receives input events from the screen, invokes Use Cases, sets loading/error states, and notifies listeners to update the UI.
Implementing a Provider (ViewModel)
Here is a state provider designed to manage authentication state:
import 'package:flutter/material.dart';
import '../../../domain/usecases/login_user_usecase.dart';

enum AuthStatus { initial, loading, authenticated, error }

class AuthProvider extends ChangeNotifier {
  final LoginUserUseCase loginUseCase;

  AuthProvider({required this.loginUseCase});

  AuthStatus _status = AuthStatus.initial;
  AuthStatus get status => _status;

  String? _errorMessage;
  String? get errorMessage => _errorMessage;

  Future<void> performLogin(String email, String password) async {
    _status = AuthStatus.loading;
    _errorMessage = null;
    notifyListeners();

    final result = await loginUseCase(email, password);

    result.fold(
      (failure) {
        _status = AuthStatus.error;
        _errorMessage = failure.message;
      },
      (user) {
        _status = AuthStatus.authenticated;
      },
    );
    notifyListeners();
  }
}
Dependency Injection: Wiring it Together
With three modular layers, you need a clean system to wire up class instances. We use GetIt as our service locator for dependency injection (DI).
Dependency Registration Strategy
We split registration into two main categories:
- Global Services: Instantiated as lazy singletons (
registerLazySingleton), such as HTTP clients, network connectivity observers, and local secure storage. - Screen-Level Components: Registered as factories (
registerFactory) to guarantee that a fresh instance is created and disposed of when a user navigates to a screen and leaves it.
Feature Dependency Registration
Every feature folder has its own dependency injection config file:
import 'package:get_it/get_it.dart';
import '../domain/usecases/login_user_usecase.dart';
import '../domain/repositories/auth_repository.dart';
import '../data/repositories/auth_repository_impl.dart';
import '../data/datasources/auth_remote_datasource.dart';
import '../presentation/providers/auth_provider.dart';

final di = GetIt.instance;

class AuthDi {
  void init() {
    // 1. Data Sources
    di.registerLazySingleton<AuthRemoteDataSource>(
      () => AuthRemoteDataSourceImpl(dioClient: di()),
    );

    // 2. Repositories
    di.registerLazySingleton<AuthRepository>(
      () => AuthRepositoryImpl(remoteDataSource: di()),
    );

    // 3. Use Cases
    di.registerLazySingleton(() => LoginUserUseCase(di()));

    // 4. Presentation Providers (Factories)
    di.registerFactory(() => AuthProvider(loginUseCase: di()));
  }
}
Then initialize this configuration within the root injection file:
// lib/app/injection_container.dart
Future<void> initializeDependencies() async {
  // Initialize Core Services (Storage, Networking, Theme)
  await CoreDi().init();

  // Initialize Features
  AuthDi().init();
}
Built-In Responsive Design & Scaling Engine
Building a cross-platform Flutter application means your UI must adapt flawlessly across compact phones, large flagship devices, foldables, and tablets in both portrait and landscape modes.
Instead of relying on heavy third-party screen adaptation packages, my Clean Architecture template includes a custom, self-contained responsive engine located in lib/core/config/ and lib/core/extensions/.
1. The Core Responsive Engine (responsive_config.dart)
The ResponsiveConfig class captures the device dimensions via MediaQuery and proportionally calculates height, width, font scale, and corner radius based on standard reference design specs (e.g., iPhone 13/14 Pro for mobile and iPad Pro 11" for tablets):
import 'package:flutter/material.dart';
import '../services/logger/logger_service.dart';

class ResponsiveConfig {
  static late double screenWidth;
  static late double screenHeight;
  static late Orientation orientation;
  static late bool isTablet;

  static late double mobileReferenceHeight;
  static late double mobileReferenceWidth;
  static late double tabletReferenceHeight;
  static late double tabletReferenceWidth;

  static bool _initialized = false;

  static void _init(
    BuildContext context, {
    Size mobileSize = const Size(375, 812), // iPhone 13/14 Pro design base
    Size tabletSize = const Size(834, 1194), // iPad Pro 11" design base
    bool isDebugPrint = false,
    bool Function(Size size)? customTabletCheck,
  }) {
    final size = MediaQuery.of(context).size;

    screenWidth = size.width;
    screenHeight = size.height;
    orientation = MediaQuery.of(context).orientation;

    mobileReferenceHeight = mobileSize.height;
    mobileReferenceWidth = mobileSize.width;
    tabletReferenceHeight = tabletSize.height;
    tabletReferenceWidth = tabletSize.width;

    isTablet = customTabletCheck != null
        ? customTabletCheck(size)
        : _defaultTabletCheck(size);

    _initialized = true;
  }

  static bool _defaultTabletCheck(Size size) {
    final shortestSide = size.shortestSide;
    return shortestSide >= 600 && (size.height / size.width) < 1.6;
  }

  static double height(double inputHeight) {
    _assertInitialized();
    final refHeight = isTablet ? tabletReferenceHeight : mobileReferenceHeight;
    return (inputHeight / refHeight) * screenHeight;
  }

  static double width(double inputWidth) {
    _assertInitialized();
    final refWidth = isTablet ? tabletReferenceWidth : mobileReferenceWidth;
    return (inputWidth / refWidth) * screenWidth;
  }

  static double scale(double fontSize) {
    _assertInitialized();
    final refWidth = isTablet ? tabletReferenceWidth : mobileReferenceWidth;
    return (fontSize / refWidth) * screenWidth;
  }

  static double radius(double radius) {
    _assertInitialized();
    final refWidth = isTablet ? tabletReferenceWidth : mobileReferenceWidth;
    return (radius / refWidth) * screenWidth;
  }

  static void _assertInitialized() {
    if (!_initialized) {
      throw FlutterError('ResponsiveConfig not initialized.');
    }
  }
}
The system wraps the widget tree using ResponsiveProvider and a LayoutBuilder, guaranteeing that responsive metrics recompute automatically whenever the screen rotates or resizes.
2. Ergonomic Responsive Extensions (responsive_extension.dart)
Writing verbose scaling calls throughout your UI slows down development. The template provides syntactic extension methods on numbers (num) and BuildContext for clean, readable widget code:
import 'package:flutter/widgets.dart';
import '../config/responsive_config.dart';

extension ResponsiveNum on num {
  double get h => ResponsiveConfig.height(toDouble());
  double get w => ResponsiveConfig.width(toDouble());
  double get sp => ResponsiveConfig.scale(toDouble());
  double get r => ResponsiveConfig.radius(toDouble());

  // Responsive Spacers (SizedBox shortcuts)
  SizedBox get ht => SizedBox(height: ResponsiveConfig.height(toDouble()));
  SizedBox get wt => SizedBox(width: ResponsiveConfig.width(toDouble()));
}

extension ScreenSize on BuildContext {
  double get sh => MediaQuery.of(this).size.height;
  double get sw => MediaQuery.of(this).size.width;
  bool get isTablet => ResponsiveConfig.isTablet;
  Orientation get orientation => ResponsiveConfig.orientation;
  double get pixelRatio => MediaQuery.of(this).devicePixelRatio;
  EdgeInsets get safeArea => MediaQuery.of(this).padding;
}
3. Practical Usage Comparison
| Requirement | Traditional Flutter Code | Template Responsive Syntax |
|---|---|---|
| Scaled Height | MediaQuery.of(context).size.height * (24 / 812) | 24.h |
| Scaled Width | MediaQuery.of(context).size.width * (16 / 375) | 16.w |
| Dynamic Font Size | fontSize: 18 * (screenWidth / 375) | fontSize: 18.sp |
| Border Radius | BorderRadius.circular(radiusScaled) | BorderRadius.circular(12.r) |
| Vertical Spacer | SizedBox(height: calculatedHeight) | 16.ht |
| Horizontal Spacer | SizedBox(width: calculatedWidth) | 12.wt |
| Tablet Layout Check | MediaQuery.of(context).size.shortestSide >= 600 | context.isTablet |
Here is how clean your widget tree looks when building with these helpers:
Widget build(BuildContext context) {
  return Padding(
    padding: EdgeInsets.symmetric(horizontal: 16.w, vertical: 20.h),
    child: Column(
      children: [
        Text(
          'Clean Architecture in Action',
          style: TextStyle(fontSize: 22.sp, fontWeight: FontWeight.bold),
        ),
        16.ht, // Responsive vertical spacing
        Container(
          height: 120.h,
          width: double.infinity,
          decoration: BoxDecoration(
            borderRadius: BorderRadius.circular(16.r),
            color: Colors.blue.shade50,
          ),
        ),
      ],
    ),
  );
}
Project Directory Structure
Here is how files are organized in a production-ready clean architecture structure. Grouping elements by features is far more scalable than grouping by layers (like putting all repositories across the entire app into a single global folder).
lib/
├── main.dart                     # App setup & execution
├── app/
│   ├── app_name.dart             # Main App root widget
│   └── injection_container.dart  # Dependency injection setup
├── core/                         # Shared code used across multiple features
│   ├── config/                   # Scaling & Responsive configurations
│   ├── extensions/               # Responsive, Context, and String extensions
│   ├── services/                 # Dio, Logger, Local Storage, Notifications
│   ├── theme/                    # Color palette, Theme definitions
│   └── widgets/                  # Reusable UI library (Buttons, Dialogs, Shimmers)
└── features/                     # Self-contained modules
    └── auth/                     # Example authentication feature
        ├── data/                 # Models, Data Sources, Repositories
        ├── domain/               # Use cases, Entities, Repo contracts
        ├── presentation/         # View widgets, Screens, Providers
        └── auth_di.dart          # Local feature dependency registrations
The Pre-Built Service Layer
My Flutter Clean Architecture Template includes pre-built services that every production mobile app requires. You do not need to build these helper tools from scratch:
| Service | Technology Used | Features |
|---|---|---|
| HTTP Client | dio | Interceptors, custom headers, auto-retry token refresh logic |
| Secure Storage | flutter_secure_storage | Keychain (iOS) and Keystore (Android) read and write utilities |
| Connectivity | connectivity_plus | Real-time network sync streams and offline UI popups |
| Logger | Custom dart log wrap | Class-scoped diagnostic console printouts |
| Image Picker | image_picker | Camera and gallery access with permissions verification |
| Push Notifications | firebase_messaging | Firebase Cloud Messaging wrapper |
Best Practices for Scaling
When writing code under a Clean Architecture design, adhere to these constraints to ensure project maintainability:
- Strict Layer Independence: The domain layer must never import files from the data layer or presentation layer. If you see
import '../data/...'inside a domain class, you have broken the architecture contract. - Use Factories for Providers: Register ChangeNotifiers as factories. This ensures that when a user exits a page, the memory allocated for that viewmodel is released.
- Gate UI Styling & Sizing: Never hardcode raw pixel values, colors (
Colors.blue), or typography in widgets. Use responsive extensions (.h,.w,.sp) alongside theme context extensions (context.colorsandcontext.textTheme). - Wrap Remote Calls: Always run remote calls inside repository implementations in try-catch wrappers, converting unexpected server crashes into type-safe custom exceptions.
How to Get Started with the Template
You can easily instantiate this clean architecture template into your development workspace in one of two ways:
Method 1: NPX CLI Setup
If you are pair programming with an agent or using developer tools, you can add this template as a skill using the CLI command:
npx skills add itsmoeenahmad/flutter-clean-architecture-template --skill flutter-clean-arch
Method 2: Git Setup
Alternatively, clone the repository directly from GitHub:
# Clone the repository
git clone https://github.com/itsmoeenahmad/flutter-clean-architecture-template.git

# Navigate into the project folder
cd flutter-clean-architecture-template

# Download packages
flutter pub get

# Run on emulator or device
flutter run
Conclusion
Implementing Clean Architecture in Flutter requires self-discipline, but the payoff is substantial. By separating your project into Presentation, Domain, and Data layers, you create a codebase that is easy to scale, test, and adapt as your product demands evolve.
By leveraging the pre-configured responsive design engine, database setups, theme systems, HTTP clients, and dependency container rules in my Flutter Clean Architecture Template, you save days of boilerplate setup and establish a solid architectural foundation from day one.
Start clean, maintain the layer separations, and build mobile apps that are engineered to last.
Need a robust, scalable codebase structure for your mobile app? I help businesses architect and refactor Flutter applications using strict Clean Architecture rules, ensuring codebases remain maintainable for long-term growth. Book a meeting to discuss your app's code structure.
Written by Moeen Ahmad, Senior Software Engineer working across mobile apps, backend systems, cloud deployments, and AI-powered products. I write about practical engineering, real project lessons, and building software that actually ships.
Interested in working together?
Let's discuss your project and explore how I can help bring it to life.