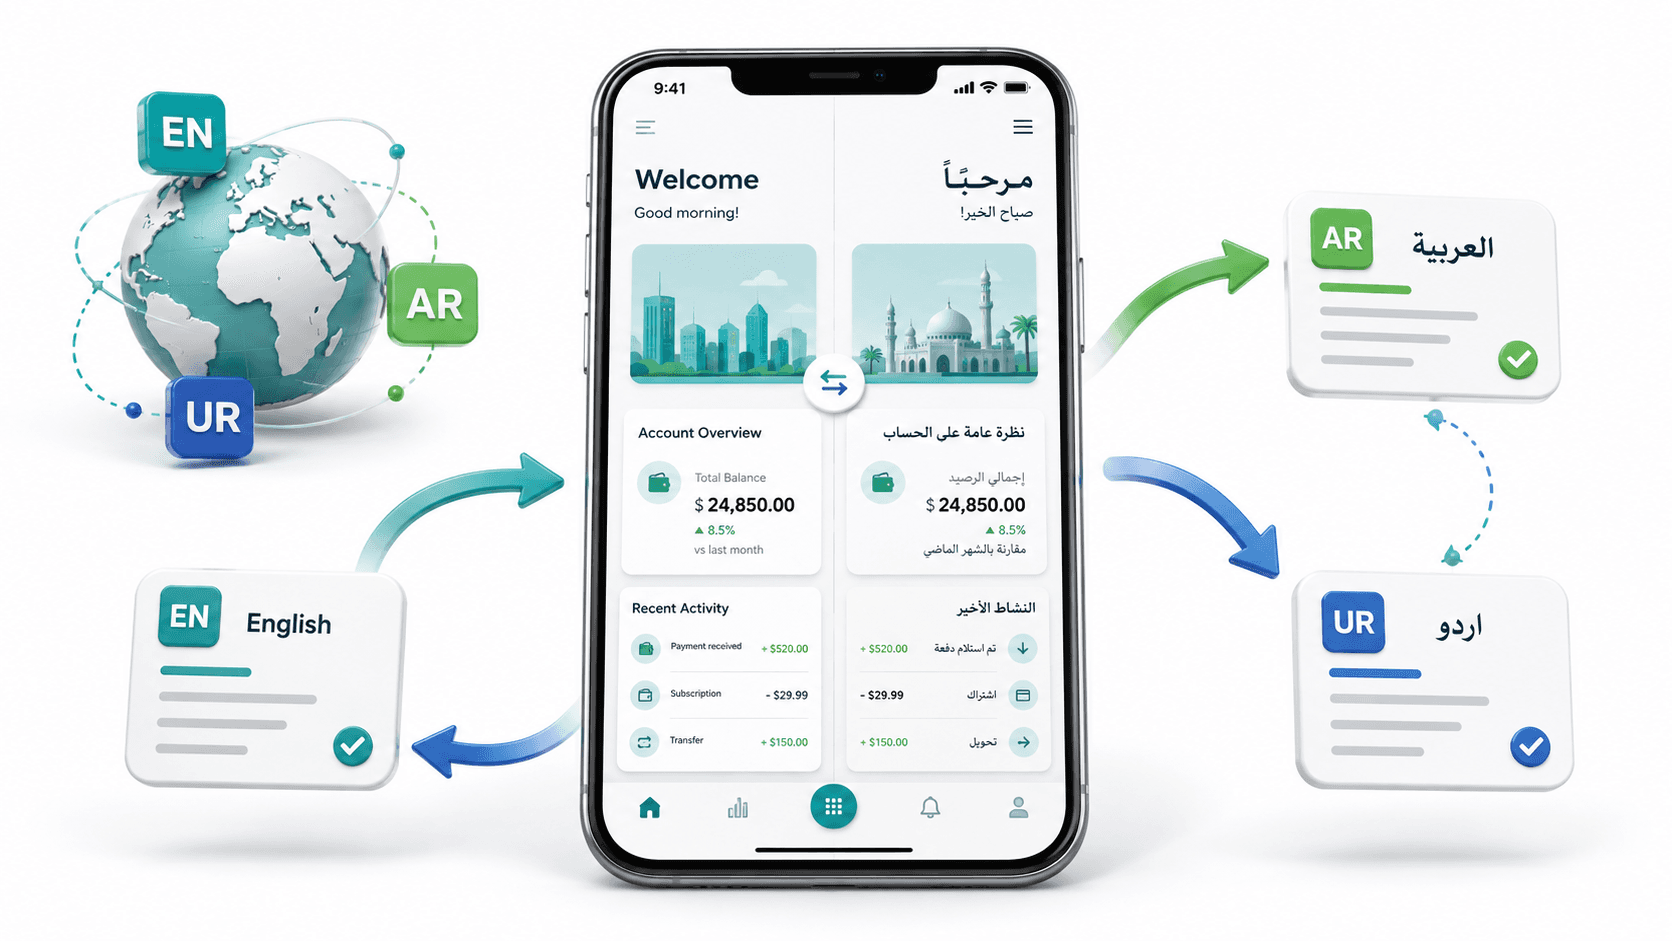
Introduction
Most Flutter tutorials show you how to build apps for a single language. But when you are building a real product for a regional or global market, localization becomes critical from day one.
Localization (often abbreviated as l10n) is the process of adapting your app's text, dates, numbers, currency symbols, and layout direction to match the language and cultural norms of your target users.
Internationalization (i18n) is the process of building your app in a way that makes localization straightforward - separating translatable strings from your Dart code and making layout direction-agnostic.
I have implemented full localization in production apps serving Arabic, Urdu, and English users simultaneously, including real-time locale switching without app restarts, RTL layout flipping, and backend responses that adapt to the user's selected language. One of the best examples is BeesApp (Android) - a Saudi Arabian rewards app live on both the App Store and Google Play that serves Arabic-speaking and English-speaking users with a fully localized experience. This guide covers everything from the initial setup to the advanced patterns used in that production app.
How Flutter Localization Works
Flutter's localization system works through three core layers:
- ARB Files: JSON-like files containing key-value pairs of your translated strings for each language.
- Generated Dart Classes: Flutter's build system auto-generates strongly-typed accessor classes from your ARB files.
- MaterialApp Locale Delegates: You register locale delegates in
MaterialApp, and Flutter uses them to look up the correct translated string based on the device/app locale.
Step 1: Add Dependencies
# pubspec.yaml
dependencies:
  flutter:
    sdk: flutter
  flutter_localizations:
    sdk: flutter
  intl: ^0.19.0

flutter:
  generate: true # IMPORTANT: enables code generation from ARB files
Run flutter pub get after updating.
Step 2: Configure l10n.yaml
Create l10n.yaml at the project root to configure the code generator:
arb-dir: lib/l10n
template-arb-file: app_en.arb
output-localization-file: app_localizations.dart
output-class: AppLocalizations
nullable-getter: false
Step 3: Create ARB Files
ARB (Application Resource Bundle) files are the translation source files. Create one per supported language in lib/l10n/:
lib/l10n/app_en.arb (English - the template):
{
  "@@locale": "en",

  "appName": "BeesApp",
  "@appName": {
    "description": "The name of the application"
  },

  "welcomeMessage": "Welcome back, {name}!",
  "@welcomeMessage": {
    "description": "Greeting message shown on the home screen",
    "placeholders": {
      "name": {
        "type": "String",
        "example": "Moeen"
      }
    }
  },

  "loginButton": "Login",
  "@loginButton": { "description": "Login button label" },

  "emailLabel": "Email Address",
  "@emailLabel": { "description": "Email input field label" },

  "passwordLabel": "Password",
  "@passwordLabel": { "description": "Password input field label" },

  "itemCount": "{count, plural, =0{No items} =1{1 item} other{{count} items}}",
  "@itemCount": {
    "description": "Item count with plural support",
    "placeholders": {
      "count": { "type": "int" }
    }
  },

  "errorGeneral": "Something went wrong. Please try again.",
  "@errorGeneral": { "description": "Generic error message" },

  "noInternetConnection": "No internet connection",
  "@noInternetConnection": { "description": "Offline error message" }
}
lib/l10n/app_ar.arb (Arabic):
{
  "@@locale": "ar",

  "appName": "بيس آب",
  "welcomeMessage": "مرحباً بعودتك، {name}!",
  "loginButton": "تسجيل الدخول",
  "emailLabel": "البريد الإلكتروني",
  "passwordLabel": "كلمة المرور",
  "itemCount": "{count, plural, =0{لا توجد عناصر} =1{عنصر واحد} other{{count} عناصر}}",
  "errorGeneral": "حدث خطأ ما. يرجى المحاولة مرة أخرى.",
  "noInternetConnection": "لا يوجد اتصال بالإنترنت"
}
lib/l10n/app_ur.arb (Urdu):
{
  "@@locale": "ur",

  "appName": "بیز ایپ",
  "welcomeMessage": "واپس خوش آمدید، {name}!",
  "loginButton": "لاگ ان",
  "emailLabel": "ای میل",
  "passwordLabel": "پاس ورڈ",
  "itemCount": "{count, plural, =0{کوئی آئٹم نہیں} =1{1 آئٹم} other{{count} آئٹمز}}",
  "errorGeneral": "کچھ غلط ہوگیا۔ براہ کرم دوبارہ کوشش کریں۔",
  "noInternetConnection": "انٹرنیٹ کنکشن نہیں ہے"
}
After creating ARB files, run:
flutter gen-l10n
This generates the AppLocalizations class in .dart_tool/flutter_gen/.
Step 4: Configure MaterialApp
// lib/app/app_name.dart
import 'package:flutter/material.dart';
import 'package:flutter_localizations/flutter_localizations.dart';
import 'package:flutter_gen/gen_l10n/app_localizations.dart';
import 'package:provider/provider.dart';
import '../core/providers/locale_provider.dart';

class MyApp extends StatelessWidget {
  const MyApp({super.key});

  @override
  Widget build(BuildContext context) {
    return Consumer<LocaleProvider>(
      builder: (context, localeProvider, child) {
        return MaterialApp(
          title: 'BeesApp',
          debugShowCheckedModeBanner: false,

          // Active locale - driven by LocaleProvider
          locale: localeProvider.locale,

          // All supported locales
          supportedLocales: const [
            Locale('en'), // English
            Locale('ar'), // Arabic
            Locale('ur'), // Urdu
          ],

          // Delegates that provide localized strings, dates, and formatting
          localizationsDelegates: const [
            AppLocalizations.delegate, // Your generated strings
            GlobalMaterialLocalizations.delegate, // Material widget strings
            GlobalWidgetsLocalizations.delegate, // Widget text direction
            GlobalCupertinoLocalizations.delegate, // iOS-style widgets
          ],

          // Fallback locale resolution when device locale is not supported
          localeResolutionCallback: (deviceLocale, supportedLocales) {
            for (final supported in supportedLocales) {
              if (supported.languageCode == deviceLocale?.languageCode) {
                return supported;
              }
            }
            return const Locale('en'); // Default fallback
          },

          home: const HomeScreen(),
        );
      },
    );
  }
}
Step 5: Build the Locale Provider
A LocaleProvider manages the currently selected locale and persists it across app restarts using local storage:
// lib/core/providers/locale_provider.dart
import 'package:flutter/material.dart';
import 'package:get_it/get_it.dart';
import '../services/local_storage/local_storage_service.dart';

class LocaleProvider extends ChangeNotifier {
  static const _localeKey = 'selected_locale';

  Locale _locale = const Locale('en');
  Locale get locale => _locale;

  String get languageCode => _locale.languageCode;

  // Supported locales with display names and RTL flag
  static const supportedLanguages = [
    {'code': 'en', 'name': 'English', 'nativeName': 'English', 'isRTL': false},
    {'code': 'ar', 'name': 'Arabic', 'nativeName': 'العربية', 'isRTL': true},
    {'code': 'ur', 'name': 'Urdu', 'nativeName': 'اردو', 'isRTL': true},
  ];

  bool get isRTL => _locale.languageCode == 'ar' || _locale.languageCode == 'ur';

  final _storage = GetIt.I<LocalStorageService>();

  /// Load persisted locale on app startup
  Future<void> loadSavedLocale() async {
    final savedCode = await _storage.read(key: _localeKey);
    if (savedCode != null) {
      _locale = Locale(savedCode);
      notifyListeners();
    }
  }

  /// Change the active locale and persist it
  Future<void> setLocale(String languageCode) async {
    _locale = Locale(languageCode);
    await _storage.write(key: _localeKey, value: languageCode);
    notifyListeners();
  }
}
Step 6: Use Translations in Widgets
Access localized strings through the AppLocalizations.of(context) accessor. For cleanliness, you can create a context extension:
// lib/core/extensions/context_extensions.dart
import 'package:flutter/material.dart';
import 'package:flutter_gen/gen_l10n/app_localizations.dart';

extension LocalizationExtension on BuildContext {
  AppLocalizations get l10n => AppLocalizations.of(this);
}
Now in any widget:
class LoginScreen extends StatelessWidget {
  const LoginScreen({super.key});

  @override
  Widget build(BuildContext context) {
    return Scaffold(
      appBar: AppBar(
        title: Text(context.l10n.appName),
      ),
      body: Padding(
        padding: const EdgeInsets.all(24.0),
        child: Column(
          children: [
            Text(
              context.l10n.welcomeMessage('Moeen'), // Parameterized string
              style: Theme.of(context).textTheme.headlineSmall,
            ),
            const SizedBox(height: 24),
            TextFormField(
              decoration: InputDecoration(
                labelText: context.l10n.emailLabel,
              ),
            ),
            const SizedBox(height: 16),
            TextFormField(
              obscureText: true,
              decoration: InputDecoration(
                labelText: context.l10n.passwordLabel,
              ),
            ),
            const SizedBox(height: 24),
            ElevatedButton(
              onPressed: () {},
              child: Text(context.l10n.loginButton),
            ),

            // Plural example
            Text(context.l10n.itemCount(5)), // "5 items"
            Text(context.l10n.itemCount(1)), // "1 item"
            Text(context.l10n.itemCount(0)), // "No items"
          ],
        ),
      ),
    );
  }
}
Step 7: Language Switcher UI
class LanguageSwitcherWidget extends StatelessWidget {
  const LanguageSwitcherWidget({super.key});

  @override
  Widget build(BuildContext context) {
    final localeProvider = context.watch<LocaleProvider>();

    return Column(
      children: [
        Text(
          'Select Language',
          style: Theme.of(context).textTheme.titleMedium,
        ),
        const SizedBox(height: 12),
        ...LocaleProvider.supportedLanguages.map((lang) {
          final isSelected = localeProvider.languageCode == lang['code'];
          return ListTile(
            leading: Radio<String>(
              value: lang['code'] as String,
              groupValue: localeProvider.languageCode,
              onChanged: (value) {
                if (value != null) {
                  context.read<LocaleProvider>().setLocale(value);
                }
              },
            ),
            title: Text(lang['nativeName'] as String),
            subtitle: Text(lang['name'] as String),
            trailing: isSelected
                ? const Icon(Icons.check, color: Colors.green)
                : null,
          );
        }),
      ],
    );
  }
}
RTL Layout Support
When the user selects Arabic or Urdu, Flutter automatically flips the layout direction to RTL (Right-to-Left) for most widgets. However, there are patterns you need to follow to ensure your custom layouts flip correctly.
Always Use Directional-Aware Properties
// WRONG - hardcoded left/right will NOT flip in RTL
Padding(
  padding: const EdgeInsets.only(left: 16, right: 8),
  child: myWidget,
)

// CORRECT - start/end semantics flip automatically in RTL
Padding(
  padding: const EdgeInsetsDirectional.only(start: 16, end: 8),
  child: myWidget,
)
Use Directionality Widget for Custom Layouts
Widget build(BuildContext context) {
  final isRTL = Directionality.of(context) == TextDirection.rtl;

  return Row(
    children: [
      if (isRTL) const Spacer(),
      const Icon(Icons.arrow_forward),
      const SizedBox(width: 8),
      Text('Next Step'),
      if (!isRTL) const Spacer(),
    ],
  );
}
RTL-Safe Icon Mirroring
Some icons (like arrows and chevrons) need to be mirrored in RTL. Flutter's Icon widget supports this:
// This icon will automatically mirror in RTL layouts
const Icon(Icons.arrow_forward, textDirection: TextDirection.ltr) // Stays LTR
Icon(Icons.arrow_back, matchTextDirection: true) // Mirrors in RTL
Handling Localized Dates and Numbers
Use the intl package for locale-aware formatting:
import 'package:intl/intl.dart';

class LocalizedFormatters {
  static String formatDate(DateTime date, String locale) {
    return DateFormat.yMMMMd(locale).format(date);
    // en: "August 27, 2026"
    // ar: "٢٧ أغسطس ٢٠٢٦"
  }

  static String formatCurrency(double amount, String locale, String currency) {
    return NumberFormat.currency(
      locale: locale,
      symbol: currency,
    ).format(amount);
    // en: "$1,299.99"
    // ar: "١٬٢٩٩٫٩٩ $"
  }

  static String formatNumber(double number, String locale) {
    return NumberFormat.decimalPattern(locale).format(number);
    // en: "1,234,567"
    // ar: "١٬٢٣٤٬٥٦٧"
  }
}
Sending Language Code to the Backend
When users switch languages in your app, your backend API should also respond in the same language. The standard approach is to pass the selected locale as an HTTP header on every request.
This is implemented at the Dio interceptor level so it applies automatically to every API call without any per-request changes:
// lib/core/services/dio/interceptors/language_interceptor.dart
import 'package:dio/dio.dart';
import 'package:get_it/get_it.dart';
import '../../providers/locale_provider.dart';

class LanguageInterceptor extends Interceptor {
  @override
  void onRequest(RequestOptions options, RequestInterceptorHandler handler) {
    final localeProvider = GetIt.I<LocaleProvider>();

    // Add the Accept-Language header to every outgoing request
    options.headers['Accept-Language'] = localeProvider.languageCode;
    // e.g., 'en', 'ar', 'ur'

    super.onRequest(options, handler);
  }
}
Register it in your Dio client setup:
// lib/core/services/dio/dio_client.dart
class DioClient {
  static Dio createClient() {
    final dio = Dio(BaseOptions(baseUrl: Endpoints.baseUrl));

    dio.interceptors.addAll([
      LanguageInterceptor(), // Automatically attaches Accept-Language header
      AuthInterceptor(),
      LoggerInterceptor(),
    ]);

    return dio;
  }
}
Now the backend receives the language preference on every request and can respond with content in the correct language. See the companion blog post Localization in the Backend: How FastAPI Handles Language-Aware Responses for the complete server-side implementation.
Conclusion
Localization in Flutter is genuinely well-designed once you understand the three-layer system: ARB files for translations, generated Dart classes for type-safe access, and locale delegates for automatic resolution.
The patterns in this guide - particularly the LocaleProvider, the context extension, the Dio LanguageInterceptor, and the RTL-safe layout rules - are battle-tested and used in real production apps serving Arabic, Urdu, and English users simultaneously.
Key takeaways:
- Use ARB files, never hardcode strings inside widgets.
- Handle pluralization correctly using ICU message syntax in ARB.
- Use
EdgeInsetsDirectionalandstart/endsemantics everywhere for correct RTL behavior. - Pass the locale to your backend via the
Accept-LanguageHTTP header at the interceptor level. - Persist the user's language choice locally so it survives app restarts.
Planning to launch your app in multiple languages? I implement full internationalization (i18n), localized formats, and RTL layout support (Arabic, Urdu) for global apps. Book a meeting to translate your mobile product.
Written by Moeen Ahmad, Senior Software Engineer working across mobile apps, backend systems, cloud deployments, and AI-powered products. I write about practical engineering, real project lessons, and building software that actually ships.
Interested in working together?
Let's discuss your project and explore how I can help bring it to life.